
Changing a Flat Tire: 5 Easy Steps to Do It Right
Have you ever found yourself stranded on the side of the road with a deflated tire and no help in sight? Learning the essential skill of changing a flat tire can save you time, money, and stress in these unexpected situations. Even more valuable is understanding basic tire repair techniques that can extend the life of your tires and keep you safe on the road. This comprehensive guide will walk you through everything you need to know about handling tire emergencies and maintenance at home.
Table of Contents
Materials & Supplies
To be properly prepared for changing a flat tire or performing basic maintenance, you’ll need:
1. Spare tire – Ensure it’s properly inflated and in good condition
2. Car jack – The one that came with your vehicle is designed specifically for your car
3. Lug wrench – To remove and tighten the lug nuts
4. Tire pressure gauge – Digital gauges provide more accurate readings
5. Wheel chocks – To prevent the car from rolling while jacked up
6. Flashlight – Essential for nighttime emergencies
7. Gloves – Protects hands from dirt and possible injuries
8. Reflective triangles or flares – For roadside safety
9. Tire repair kit – For temporary fixes to small punctures
10. Portable air compressor – To inflate tires after repair or when low
Timing / Inspection Schedule

Tire inspections should be conducted monthly and before long trips. Check tire pressure when tires are cold (before driving or at least 3 hours after driving) for accurate readings. Visual inspections for wear, damage, or embedded objects should be performed weekly.
Seasonal changes often affect tire pressure, with pressure dropping about 1 PSI for every 10°F decrease in temperature. Most passenger vehicle tires last approximately 60,000 miles or 6 years, though driving habits and road conditions can significantly impact this timeframe.
Step-by-Step Instructions
1. Find a safe location – Pull completely off the road on flat ground.
Tip: Turn on hazard lights and set up reflective triangles if on a roadside.
2. Apply the parking brake – Place the car in “Park” (automatic) or in gear (manual).
Tip: Use wheel chocks on the opposite side of the flat tire for added security.
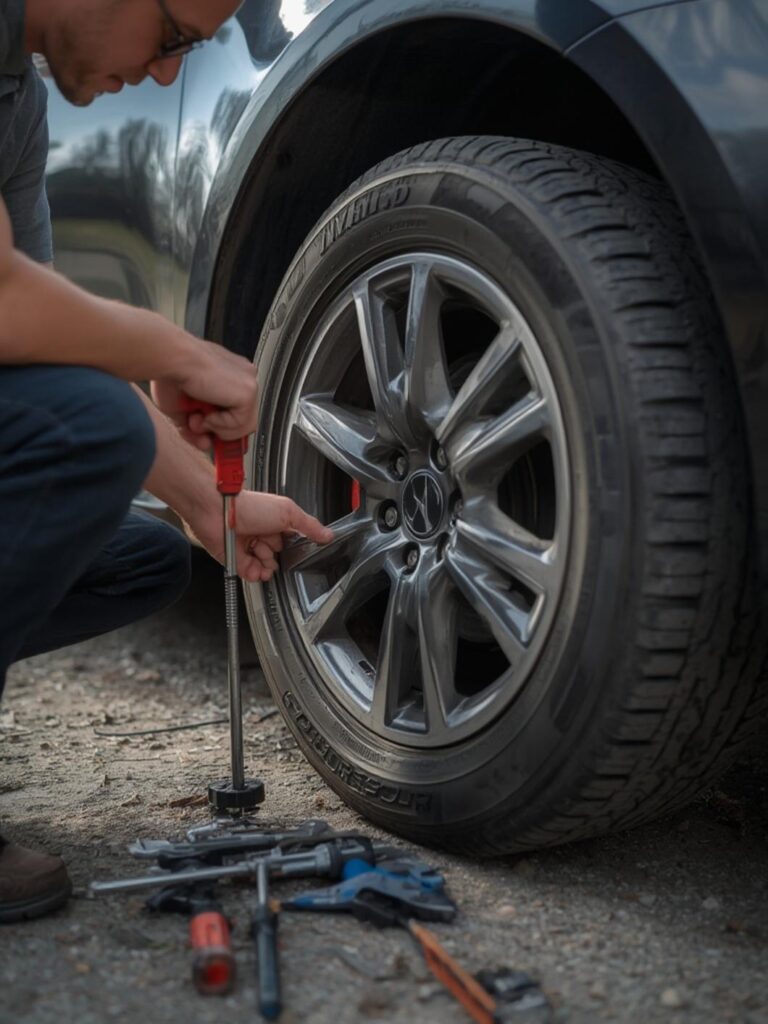
3. Loosen lug nuts – Use the lug wrench to break the tension while the tire is still on the ground.
Tip: Turn counterclockwise and apply downward pressure with your body weight.
4. Position the jack – Place under the manufacturer’s recommended lifting point.
Tip: Consult your owner’s manual for exact jack placement to avoid damage.
5. Raise the vehicle – Lift until the flat tire is about 6 inches off the ground.
Tip: Never put any part of your body under the raised vehicle.
6. Remove lug nuts – Completely unscrew them and place them in a secure location.
Tip: A hubcap can serve as a convenient container.
7. Remove the flat tire – Pull straight toward you to remove from the wheel hub.
Tip: Bend your knees, not your back, when lifting.
8. Mount the spare tire – Align the rim holes with the wheel studs.
Tip: If the tire doesn’t easily align, lower the car slightly to stabilize.
9. Replace and tighten lug nuts – Hand-tighten in a star pattern.
Tip: Never use lubricant on lug nuts as this can cause over-tightening.
10. Lower the vehicle – Lower completely before fully tightening lug nuts.
Tip: Use the wrench to tighten in a star pattern for even pressure.
After changing a flat tire, consider basic tire repair options if the damage is minor, such as a nail puncture in the tread area.
Benefits / Advantages
Learning to handle your own tire emergencies offers numerous benefits:
– Significant cost savings on roadside assistance or tow services
– Reduced downtime during emergencies
– Enhanced road safety through proactive maintenance
– Greater confidence in traveling to remote areas
– Potential to help others in similar situations
Tips, Alternative Methods, or Driving Advice
– Keep tire pressure at manufacturer-recommended levels (found in the driver’s door jamb or owner’s manual)
– Consider carrying a plug kit for emergency repairs of small punctures
– In winter conditions, reduce tire pressure slightly for better traction
– For AWD vehicles, replace all four tires simultaneously to prevent drivetrain damage
– Consider nitrogen inflation for more stable tire pressure in varying temperatures
Common Mistakes to Avoid
1. Over-tightening lug nuts – Can warp rotors or break studs
Solution: Use a torque wrench set to manufacturer specifications
2. Forgetting to block wheels – Can cause the vehicle to roll
Solution: Always use wheel chocks on the opposite axle
3. Incorrect jack placement – Can damage vehicle components
Solution: Refer to the owner’s manual for exact placement points
4. Driving too long on a compact spare – Temporary spares aren’t designed for extended use
Solution: Get the original tire repaired or replaced promptly
Storage / Maintenance Tips
Store unmounted tires in a cool, dry place away from direct sunlight and sources of ozone (electric motors, furnaces). Keep them in airtight bags to prevent rubber oxidation. For mounted tires, store them stacked horizontally or hung from tire racks.
Check tire pressure monthly and before long trips. Rotate tires every 5,000-7,500 miles to ensure even wear. Maintain proper alignment and balancing to extend tire life and improve handling.
Conclusion
Learning the proper techniques for changing a flat tire and performing basic tire repair are essential skills for every driver. These abilities not only save you money and time but also provide peace of mind knowing you can handle emergencies independently. Remember that regular maintenance and inspections are key to preventing many tire-related issues before they occur. What tire maintenance task will you tackle first? Share your experiences in the comments below!
FAQs
How long does a properly installed spare tire last?
A temporary spare (donut) should only be used for about 50-70 miles at speeds under 50 mph. A full-size spare can be used like a regular tire but should be included in your rotation schedule.
Can all flat tires be repaired?
No. Tires with sidewall damage, punctures larger than ¼ inch, or damage in the shoulder or sidewall areas should be replaced rather than repaired.
How often should I check my tire pressure?
Check tire pressure at least once a month and before long trips. Temperature changes can significantly affect pressure levels.
Is it safe to use tire sealant products for flats?
Tire sealants are suitable for temporary emergency repairs of small punctures, but they’re not a permanent solution. Have the tire professionally inspected after using sealant.
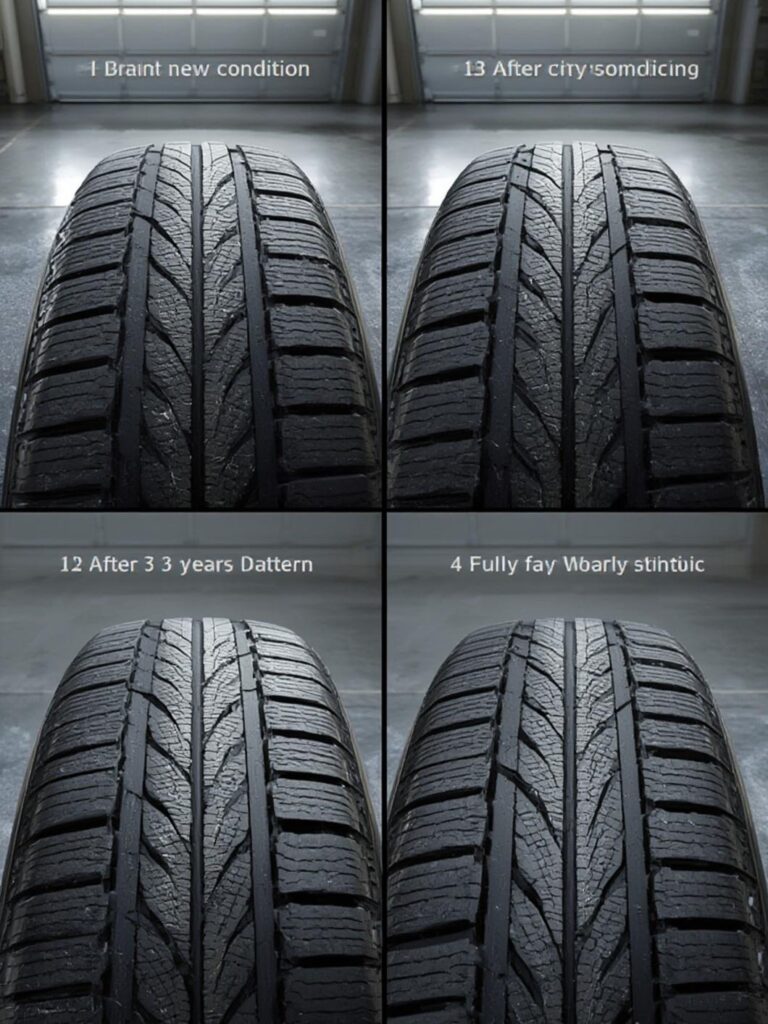
How do I know when my tires need to be replaced?
Check tread depth using the penny test (insert a penny with Lincoln’s head upside down—if you can see the top of his head, the tread is too worn). Also watch for uneven wear, cracking, bulges, or vibrations while driving.