
Quick way to grow: 7 manual tire changer tips
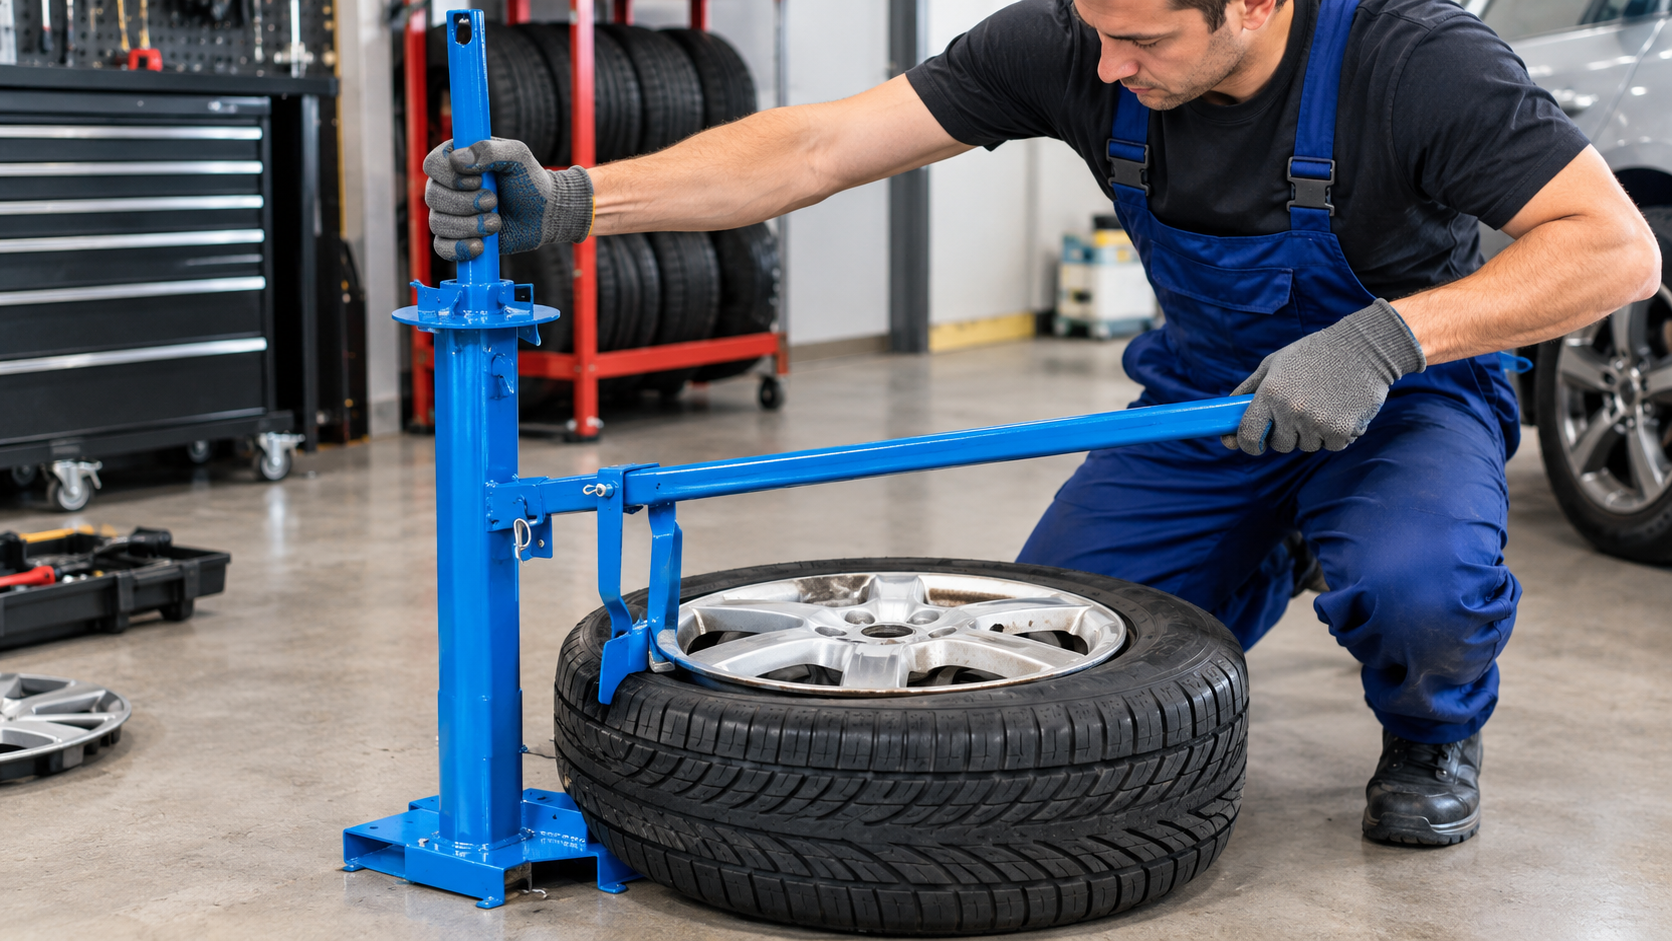
A manual tire changer gives you a dedicated way to break the bead, hold the wheel, and guide the tire on or off the rim. The key is using the machine within its rated size range, preparing the wheel correctly, and controlling leverage instead of forcing the rubber.
For a home garage or small workshop, the right manual tire changer can reduce dependence on powered shop equipment. However, it is not a shortcut around tire safety. Mounting and inflating a tire involves stored energy, so damaged wheels, mismatched tire and rim sizes, and unsuitable equipment should be left to a trained tire professional.
Tire mounting and inflation can be hazardous. Always follow the tire, wheel, and changer manufacturer’s procedures. If an assembly is damaged, mismatched, unusually difficult, or outside the tool’s stated capacity, stop and use qualified tire service instead.
This guide explains seven practical tips for choosing and using one effectively, from selecting the right design to protecting the rim and checking the finished assembly.
How a Manual Tire Changer Actually Works
Most manual changers use mechanical leverage rather than an electric motor or hydraulic system. The basic process has three jobs: break the tire bead away from the rim, remove the old tire, and position the new tire over the rim.
The bead breaker pushes the tire bead inward so it releases from the bead seat. A center post, hub adapter, or locking system keeps the wheel stable. A mounting or demounting bar then guides the bead over the rim lip as you work around it.
Because the operator controls the force and speed, technique matters. If the opposite side of the bead sits outside the rim’s drop center, the bead becomes tighter and the job becomes harder.
The goal is not to overpower the tire. Good technique uses the wheel’s geometry and the changer’s leverage to make the work controlled and repeatable.
Seven Practical Tips for Better Tire Changes
1. Match the Changer to Your Real Tire Sizes
Start with compatibility, not price. Manual tire changers vary in supported wheel diameters, construction, hub arrangements, and intended applications. Some compact models target passenger-car wheels, while others focus on motorcycles, off-road tires, or light trucks.
Write down the smallest and largest wheel sizes you expect to handle, then check the manufacturer’s specifications. Also consider the type of wheels involved. Painted or polished alloy wheels may require more protection than basic steel wheels.
- Wheel compatibility: Confirm the supported diameter and tire application.
- Physical limits: Check maximum tire width or profile restrictions when specified.
- Wheel fit: Verify hub, center-hole, or adapter requirements.
- Bead system: Check the adjustment range and included bead-breaking equipment.
- Long-term support: Look for replacement tools and wear parts that you can obtain later.
Do not assume that a universal-looking design can safely handle every wheel. Follow the tool’s published capacity. If you are also learning the basic sequence for changing a tire, this practical guide to how to change tires provides a useful companion reference before you start working with a changer.
2. Build a Stable Work Area Before You Touch the Bead
Stability is one of the biggest differences between controlled leverage and a frustrating tire job. Place the changer on a firm, level surface and secure it according to the manufacturer’s instructions. A base that shifts while you pull a long lever wastes force and can make the wheel move unexpectedly.
Clear enough space to move the handle through its full range. Keep loose tools out of the working area, wear eye protection and suitable gloves, and keep your hands away from pinch points.
Inspect the wheel before mounting it on the changer. Look for cracks, bends, heavy corrosion, sharp edges, or previous repairs. A damaged wheel is not a good candidate for a DIY mounting operation simply because the changer can physically hold it.
3. Deflate Fully and Prepare the Bead
Never treat a partially inflated tire as harmless. Before bead-breaking work, follow the tire and equipment manufacturer’s procedure for complete deflation. Removing the valve core is commonly part of professional preparation, but the exact procedure should follow the instructions applicable to your setup.
Once deflated, clean dirt and debris from the wheel’s bead area. Check the tire for cuts, bulges, cracks, or other damage. Mark directional or asymmetrical tires before removal so you can preserve their intended orientation during installation.
Use an approved tire lubricant on the bead and appropriate contact areas. Lubrication reduces friction and lets the rubber move over the rim with less force. If the bead refuses to move, stop and diagnose the cause. More leverage is not always the answer.
4. Keep the Bead in the Drop Center
The drop center is the recessed portion of the wheel that gives the tire bead the extra slack needed to move over the rim edge. Keeping the opposite section of the bead down in this area is one of the most useful techniques when mounting or removing a tire.
As you work around the wheel, watch the bead rather than only the lever. If the bead climbs out of the drop center, the remaining section becomes tighter and the lever suddenly feels much harder to move.
Work in small, controlled movements. Use rim protectors when appropriate, especially with wheels where cosmetic damage matters. Keep the mounting tool positioned according to the changer manufacturer’s instructions rather than improvising a new angle.
5. Choose a Changer That Fits Your Workflow
Not every buyer needs the same type of manual changer. A compact portable design may suit occasional home use, while a heavier steel machine can make more sense when you service several wheels regularly.
| Feature | Portable Manual Changer | Heavier Shop-Style Manual Changer |
|---|---|---|
| Portability | Easier to move and store | Usually less convenient to relocate |
| Stability | Depends strongly on setup | Often provides a more substantial base |
| Typical Use | Occasional or mobile work | Repeated garage or workshop work |
| Space Requirement | Usually smaller | Usually larger |
| Main Advantage | Convenience | Stability and repeated use |
Do not judge a changer only by its advertised leverage. A practical design should also give you a stable way to hold the wheel, clear access to the bead, and replacement parts that you can obtain when wear occurs.
If you want another practical reference on the overall tire-changing process, you can also review this guide to changing tires step by step before deciding which manual setup fits your workflow.
6. Protect TPMS Components and the Wheel
Modern wheels can contain tire-pressure monitoring components near the valve stem. The exact sensor arrangement varies by vehicle, so identify the sensor location before placing a bead-breaking or mounting tool near the rim.
Never assume the sensor is out of the way simply because you cannot see it from above. Follow the vehicle, tire, wheel, and changer instructions for the particular assembly.
The same principle applies to alloy-wheel finishes. A metal mounting bar can mark a rim if you allow the tool to slip against the face or lip. Use suitable rim protection and keep the tool under control throughout the rotation.
If your goal is repeatable results, slowing down at sensitive points is often faster overall than repairing a scratched wheel or damaged component.
7. Treat Inflation and Final Inspection as a Separate Safety Stage
Finishing the mechanical mounting process does not mean the wheel is ready for the road. The tire still needs proper inflation, inspection, and, where required, balancing.
NHTSA’s TireWise guidance emphasizes using the vehicle manufacturer’s recommended cold inflation pressure and inspecting tires for damage and wear. It also notes that new tires should be balanced when installed. For broader information, consult the National Highway Traffic Safety Administration’s official tire safety guidance.
During inflation, use the tire and wheel manufacturer’s procedures and keep yourself out of the potential trajectory of the assembly. Never use flammable substances to help seat a bead. If the bead does not seat normally, stop and identify the problem instead of increasing pressure beyond the applicable limit.
After seating, inspect both bead areas and check for abnormal leaks. Confirm the tire size, direction, and seating before the wheel goes back onto the vehicle. If the assembly requires balancing, complete that step before normal road use.
Manual Tire Changer vs. Automatic Equipment
A manual tire changer and a powered tire machine solve the same broad problem, but they fit different workflows.
Manual equipment relies on operator effort and technique. It usually requires less infrastructure and can suit occasional work. Automatic or powered machines can make repeated tire service faster and reduce physical effort, but they typically cost more and require more shop space or supporting equipment.
The important comparison is not simply speed. Consider service frequency, tire types, available workspace, and your ability to follow safe procedures consistently.
When a Manual Tire Changer Makes Sense
A manual unit can be a practical choice when you:
- Change a limited number of compatible tires.
- Want equipment that does not depend on an electric motor.
- Have a garage or mobile setup with limited space.
- Prefer a hands-on process and are prepared to learn the correct technique.
- Need a machine for a defined range of wheels rather than a full commercial tire-service setup.
It becomes a less attractive option when you routinely handle difficult low-profile, run-flat, heavy-duty, damaged, or specialty tire assemblies outside the machine’s stated capacity. In those situations, professional equipment and trained technicians may provide a safer and more appropriate process.
A Simple Pre-Job Checklist
Before starting, run through this short checklist:
- Confirm fit: Make sure the tire and wheel sizes match and the changer is rated for the assembly.
- Secure the setup: Place the changer on a stable surface and prepare the work area.
- Prepare the tire: Fully deflate it according to the applicable procedure and inspect it for damage.
- Protect components: Identify TPMS considerations and protect the wheel finish.
- Control the bead: Use approved lubricant and keep the opposite bead in the drop center.
- Finish safely: Use controlled inflation equipment, inspect the seating, and balance the assembly when required.
The Bottom Line: Use Leverage, Not Force
The biggest advantage of a manual tire changer is not that it makes every tire easy. It gives you a structured way to apply leverage while keeping the wheel supported and the work repeatable. Choose the machine around your actual wheel sizes and tire applications, build a stable workspace, prepare the tire carefully, and protect the rim and TPMS components. Most importantly, know when a job exceeds your equipment, experience, or the condition of the tire and wheel. A manual tire changer is a useful workshop tool, but it does not remove the hazards involved in tire mounting. When an assembly is damaged, mismatched, unusually difficult, or outside the manufacturer’s specifications, professional tire service is the appropriate next step.